.webp)
.svg)
Packing electronics for a move takes more planning than placing devices in a box with a few towels. TVs, gaming systems, routers, receivers, soundbars, smart hubs, and accessories are fragile, sensitive to static, and easy to mix up during a busy moving day. A better approach protects the device, keeps every cable with the right component, and helps you reconnect the items you need first.
The best process starts before anything is unplugged. Take photos, label cables, separate high-priority devices, and use packing materials that protect against shock, dust, humidity, and static. The goal is not only to prevent damage in transit, but also to make the first night in your new home easier.
At Reputation Movers, we help homeowners and renters throughout Alexandria, Northern Virginia, and the greater DMV area plan moves that account for fragile household items, including electronics. If you have questions while preparing, you can reach us at (703) 660-6683.
Start by documenting every electronic device before you unplug anything
The most useful step happens before the first cable comes out. Take clear photos of the back of each TV, gaming console, AV receiver, router, modem, smart hub, and computer setup. These photos become your reference when it is time to reconnect everything in the new home.
Make sure the photos show which cable goes into which port. This is especially important for multi-device entertainment centers, gaming rooms, home offices, and network setups. A few extra minutes with your phone can save a long search through manuals later.
It also helps to create a written or digital inventory of major electronics. Include the device name, room, serial number if available, and condition photos. That record can be useful if you need to verify what was packed or support a damage claim after transit.
Before movers handle smart TVs, gaming systems, or other connected devices, sign out of accounts when appropriate. Computers and network-attached storage should be backed up before move day. Portable drives, laptops, and tablets are often better kept with you in a personal vehicle rather than placed on the moving truck.
Use original boxes when possible, and choose sturdy cartons when you do not have them
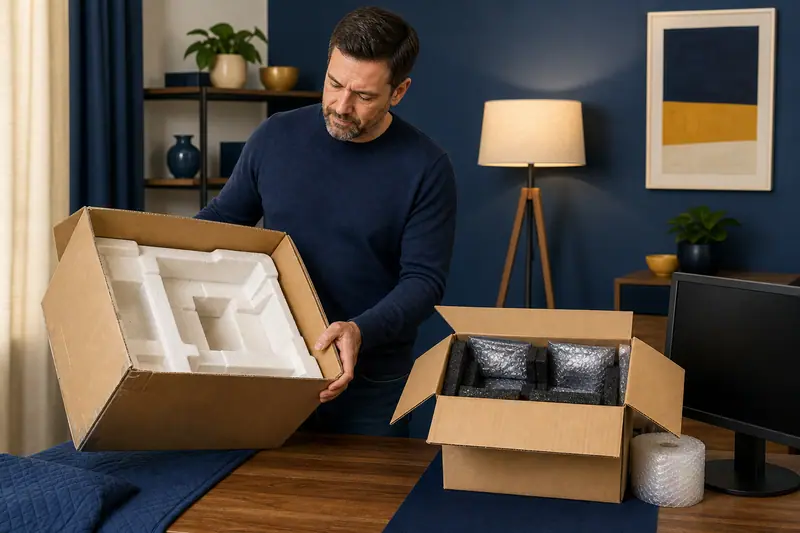
Original boxes and foam inserts are ideal for electronics because they were designed around the exact shape and weight of the device. TVs, receivers, soundbars, consoles, and monitors are easier to secure when their original inserts are still available. If you saved those boxes, use them.
Many people do not keep original packaging, especially for older TVs and audio equipment. In that case, choose sturdy, appropriately sized cartons with room for cushioning on every side. The device should not touch the sides, top, or bottom of the box directly.
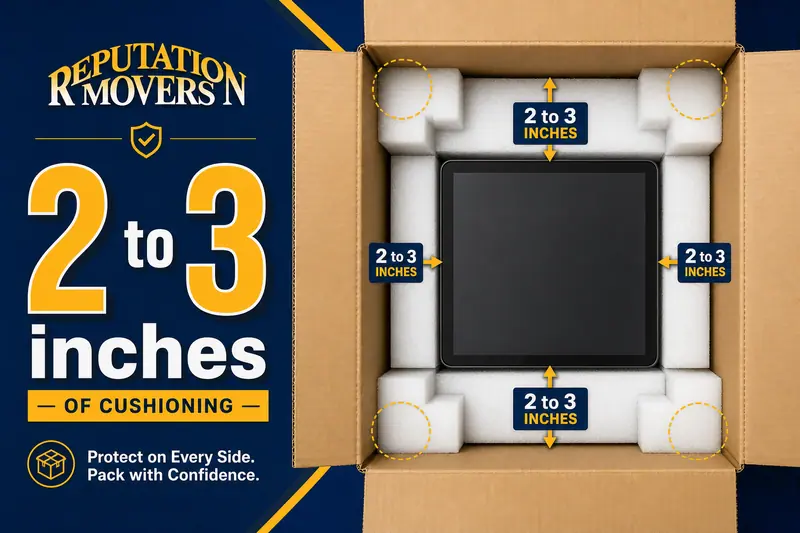
Guidance for electronics packing often recommends a protective cushion of 2 to 3 inches around the item, and 2 to 3 inches of cushioning is especially important for devices vulnerable to shock and vibration. Larger or heavier electronics may need double-walled cartons or specialized boxes.
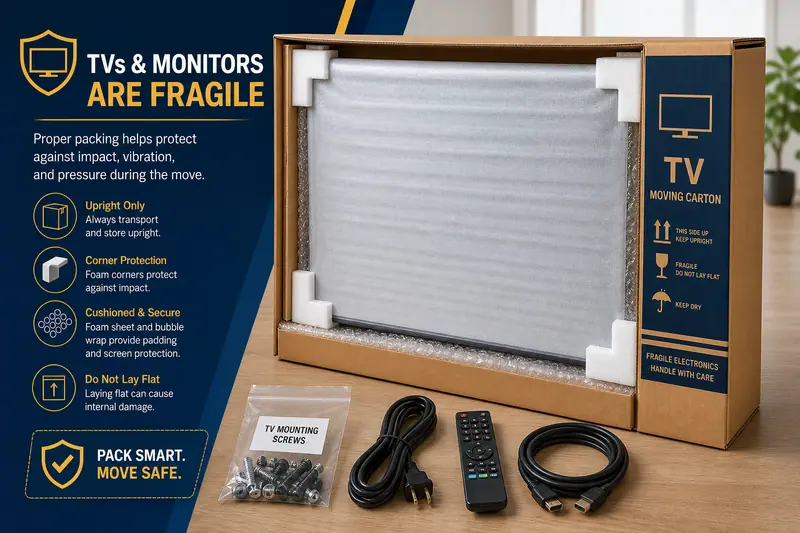
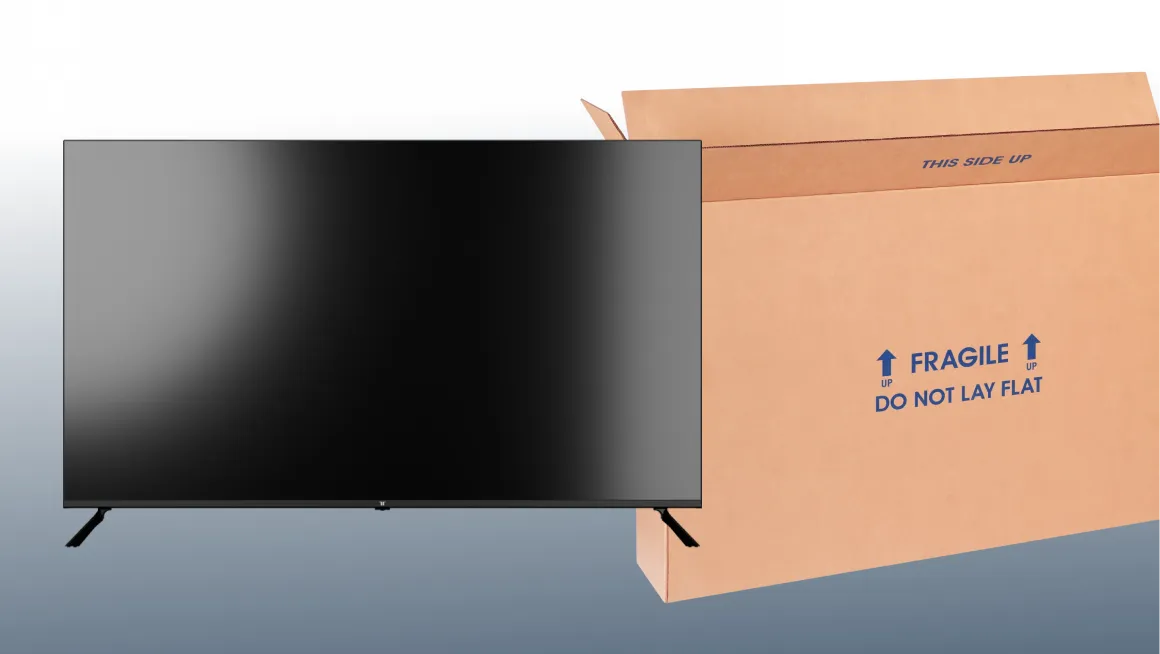
Large TVs and monitors deserve special attention. Specialized TV cartons are commonly used for screens over about 32 inches, and flat screens should be moved upright rather than lying flat. If a TV is packed flat, pressure and vibration can place the screen at greater risk.
Anti-static materials help protect sensitive electronics during a move
Electronics are vulnerable to more than bumps and drops. Static discharge, dust, debris, humidity, and temperature changes can also create problems, particularly for devices with exposed ports, circuit boards, fans, or removable components.
Anti-static bubble wrap is often pink or light blue and is different from standard clear bubble wrap. Standard bubble wrap can build static, while anti-static materials are intended to reduce static discharge risk around sensitive electronics.
This matters most when packing items such as gaming consoles, media servers, computer components, removable graphics cards, drives, and any device with exposed internal parts. Bare circuit boards and loose components should be placed in anti-static bags, then cushioned in a sturdy outer box.
Humidity also matters during storage or long-distance transit. Moisture-sensitive devices can be protected with moisture barrier bags and desiccant pouches when appropriate. If electronics have been exposed to cold trucks or storage conditions, let them reach room temperature before powering them on to reduce the chance of condensation inside the device.
At the same time, keep packing materials clean and controlled. Small loose packing peanuts can migrate into vents, fans, HDMI ports, speaker grilles, and other openings. If you use peanuts, larger anti-static types are preferred, and they should not be allowed to enter the device itself.
Pack TVs and monitors upright with screen, corner, and hardware protection
Flat-screen TVs and monitors are often the most fragile electronics in a home. They should be transported standing upright, not flat. Before packing, remove the stand or wall mount when possible and keep the screws in a labeled bag.
If you do not have the original TV box, build protection in layers. Start with a soft cloth or foam sheet over the screen. Add cardboard corner protectors if available, then wrap the TV with bubble wrap. Avoid placing tape directly on the display surface.
For larger screens, a specialized TV carton is usually the safer choice. Some packing guidance recommends adding a protective layer before using low-tack masking tape in an X pattern over glass surfaces to help hold pieces together if cracking occurs, but the tape should not touch the screen itself.
Wall mount brackets, TV legs, remotes, power cords, and HDMI cables should be grouped by device. A bag labeled “Living Room TV” is more useful than a loose bundle of cords in a general electronics box. Tape the bag gently to the wrapped stand or place it in the same carton as the TV accessories.
Pack gaming consoles, media players, and controllers so ports and accessories stay protected
Gaming consoles and media devices need both data preparation and physical protection. Before packing, eject all discs or cartridges. Sync save files to the cloud if that option is part of your setup. Power the console down fully and allow it to cool before wrapping.
Each console should be wrapped in bubble wrap or foam and placed in a snug box with extra padding around it. Controllers should be wrapped separately so they do not scratch the console or press against ports. Games, Blu-ray discs, and cartridges are best packed in a dedicated small carton or case so heavier items do not crush them.
If a media server or advanced console setup includes removable components, only remove them if you are comfortable following the manual. Sensitive cards or drives should be packed in anti-static protection and placed in a small, well-padded box.
The most common setup problem after a move is not damage, it is missing accessories. A controller without the charging cable, a console without the HDMI cord, or a headset packed in another room can slow everything down. Keep accessories grouped by device, not by general category.
Protect audio equipment from weight, vibration, and pressure on knobs or ports
Home audio equipment can be heavy, dense, and delicate. AV receivers, amplifiers, powered speakers, soundbars, and subwoofers need enough padding to absorb vibration and prevent pressure on controls, corners, ports, and speaker drivers.
Receivers and amplifiers should generally be packed one per box. They are heavy enough to damage nearby items if packed together. Wrap each unit with thick cushioning and pay attention to front knobs and rear input jacks.
Speakers should be kept upright when possible. Bookshelf and tower speakers need padding around corners and drivers. For large speakers on short local moves, moving blankets plus stretch wrap may be suitable when the item can be secured carefully, but exposed drivers still need rigid protection such as cardboard or foam over the front face.
Soundbars should be wrapped separately from subwoofers and brackets. Small mounting pieces, optical cables, HDMI cables, and power cords should be placed in labeled bags. A label such as “Family Room Soundbar, power cord, optical cable, wall bracket screws” makes reinstallation much easier.
Pack routers, modems, smart hubs, and Wi-Fi gear as a first-night priority
Network equipment may be small, but it is one of the most important categories to find quickly after a move. Routers, modems, mesh Wi-Fi nodes, smart hubs, and smart speakers often control internet access, streaming, work-from-home equipment, and connected home devices.
Before disconnecting anything, photograph the setup and label the cables. Clear labels such as “modem to router WAN” or “router to switch port 1” are more useful than generic labels like “internet cable.” Take a close photo of modem or gateway stickers if they show default network details or admin information.
Each network device should be wrapped lightly in bubble wrap or foam and packed with its power adapter, Ethernet cables, mounting hardware, and related accessories. Mesh nodes and smart hubs should stay together if they are part of the same system.
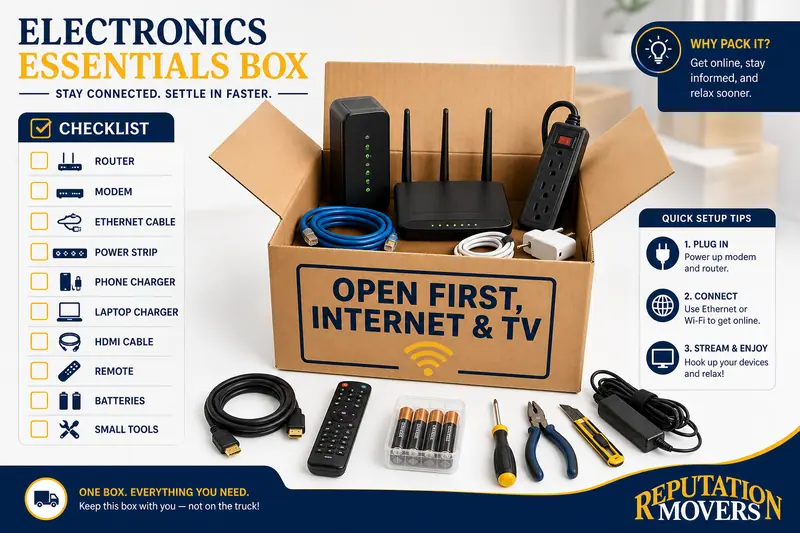
To make the first day easier, place network gear in a clearly marked box such as “OPEN FIRST, INTERNET & TV.” Some moving guidance recommends a dedicated essentials box with the main router and modem, and router and modem essentials should be kept easy to reach rather than buried among general cartons.
Create an electronics essentials box for fast setup at the new home
An electronics essentials box is separate from your general electronics cartons. It contains the items you will want immediately, especially for internet, charging, and basic entertainment. This box should be easy to identify and, when practical, transported in your own vehicle.
The right contents depend on your household, but the purpose is simple. You are packing a small set of high-priority items so you do not have to unpack an entire office or entertainment center on the first night. Keep the box limited, labeled, and practical.
Before building this box, think through the first 24 hours in the new home. You may need internet access, phone charging, a laptop charger, one TV remote, and a simple streaming setup. Once you identify those needs, pack only what supports them.
Primary router and modem
Power adapters for router, modem, and mesh nodes
At least one Ethernet cable
Power strip or surge protector
Main streaming device or smart TV remote
Phone chargers for household members
Laptop or tablet charger
Basic HDMI cable
AA or AAA batteries for remotes after batteries have been removed for transit
Small tools such as screwdrivers, scissors, tape, and mounting hardware if needed
Write the exact contents on the side of the carton. For example, “Router, Modem, Mesh Node 1, Power Strip, Roku, TV Remote, 2 HDMI.” This lets you confirm what is inside without fully unpacking the box.
Label electronics boxes so movers know the room, contents, and handling instructions
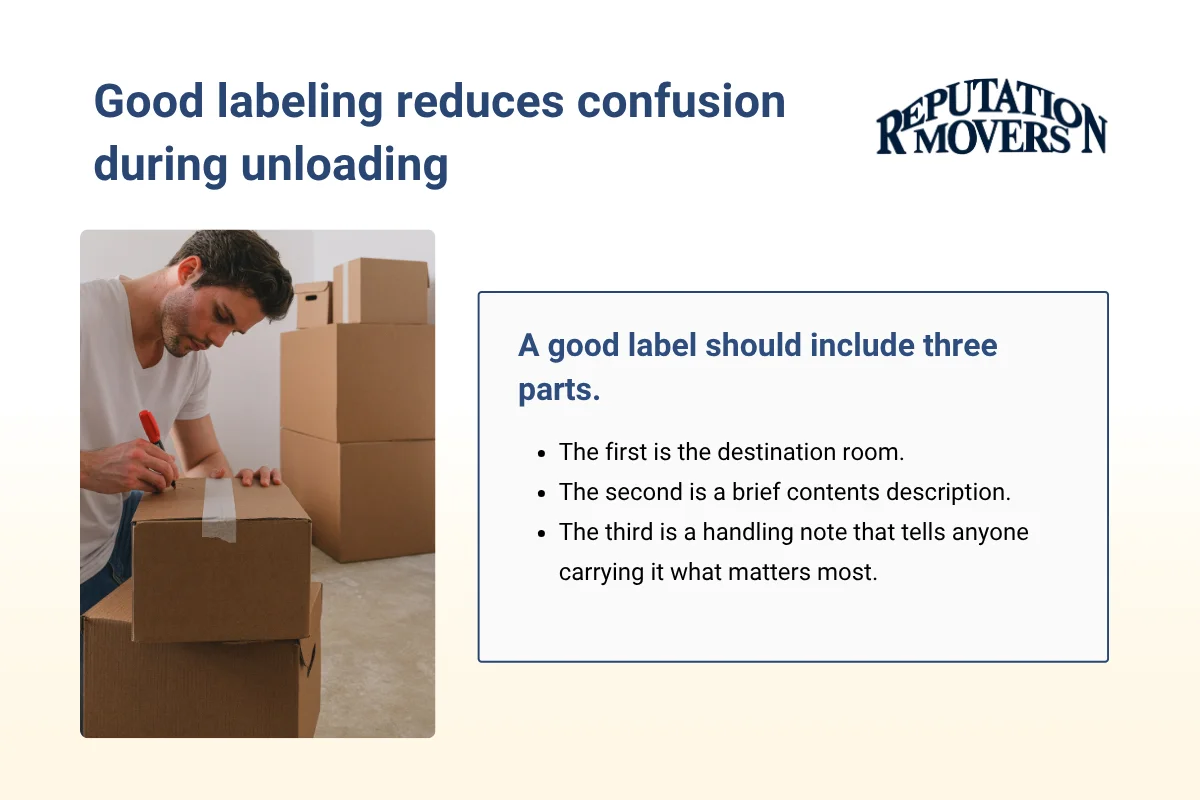
Good labeling reduces confusion during unloading and speeds up setup. Every electronics carton should identify where it goes, what it contains, and how it should be handled. A box labeled “Electronics” is not specific enough.
Use labels on at least two sides of the box so they remain visible even when cartons are stacked. Add arrows or “THIS SIDE UP” instructions for TVs, monitors, tower PCs, speakers, and other devices that should remain upright. Mark “FRAGILE” clearly when the contents require careful handling.
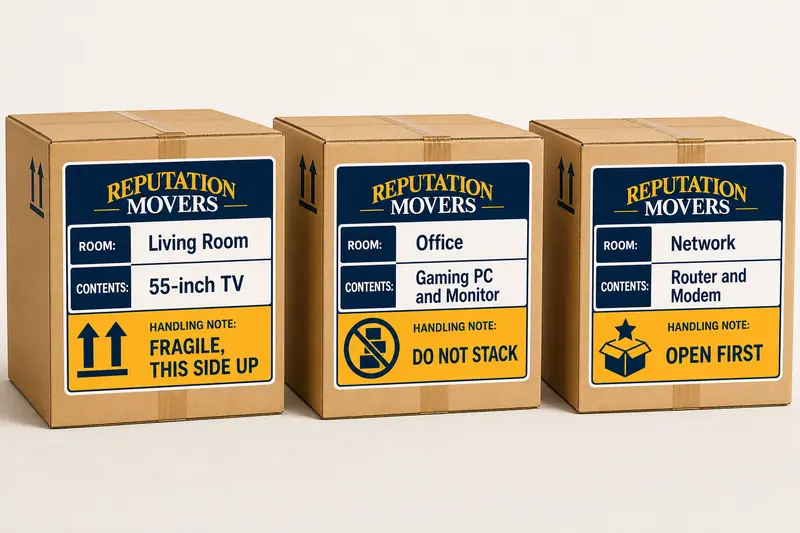
A good label should include three parts. The first is the destination room. The second is a brief contents description. The third is a handling note that tells anyone carrying it what matters most.
Living Room, 55-inch TV, FRAGILE, THIS SIDE UP
Office, Gaming PC and Monitor, FRAGILE, DO NOT STACK
Family Room, AV Receiver and Blu-ray Player, HEAVY, KEEP UPRIGHT
Bedroom, TV Cables and Remote, OPEN WITH BEDROOM TV
Network, Router and Modem, OPEN FIRST, DO NOT STORE
Speakers, Floorstanding Pair, KEEP UPRIGHT
Color coding can also help. Assign a color sticker to each room and place matching stickers on the room’s doorframe and the corresponding boxes. For complicated entertainment centers, colored dots on cable ends and matching ports can make reconnection more straightforward.
Keep cables, remotes, chargers, and batteries organized by device
Small accessories create big setup delays when they are packed loosely. Remotes, chargers, game controllers, HDMI cables, power cords, and mounting screws should be grouped with the device they support. The goal is to avoid a box full of mystery cables.
Remove batteries from remotes and portable devices before packing to reduce the risk of leaks. Place accessories in labeled resealable bags. A label such as “PS5, controllers, power cord, HDMI, headset” is much better than “game stuff.”
You can place each accessory bag in the same box as the device or tape it gently to the wrapped item if that does not risk surface damage. For high-use items, keep the most important remotes and chargers in the electronics essentials box instead.
For complicated setups, label both ends of important cables. A matching color dot on the TV port and HDMI cable, for example, can help you reconnect everything faster. This is especially useful for AV receivers, gaming zones, smart hubs, and network switches.
Control temperature, humidity, dust, and cooling before and after packing
Electronics should be fully powered down and allowed to cool before packing. TVs, amplifiers, consoles, and receivers can retain heat after use. Wrapping warm electronics in insulating materials can trap heat inside the package.
Clean electronics with a dry cloth and compressed air before packing so dust and debris do not move with the device. Cover vents and ports loosely so packing fibers or peanuts do not enter. Do not use regular newspaper directly on screens, because ink can transfer and the paper can scratch delicate coatings.
Humidity becomes more important when electronics will be stored or moved long distance. Moisture barrier bags and desiccant pouches can help protect moisture-sensitive components. Packaging guidance for electronics storage notes that moisture barrier bags with desiccant are used to absorb excess humidity around sensitive devices.
After delivery, let electronics acclimate to room temperature before plugging them in if they were exposed to cold trucks or storage conditions. This waiting period helps reduce the risk of condensation inside TVs, receivers, game consoles, and similar devices.
Know when professional packing is worth it for electronics
Many electronics can be packed safely with careful preparation, the right cartons, and proper labeling. Some items, however, justify professional packing because they are high value, unusually fragile, heavy, or part of a complicated setup.
Large OLED or QLED TVs, curved screens, high-end AV receivers, amplifiers, premium floorstanding speakers, studio monitors, custom gaming PCs, and home-theater components may require specialized cartons, corner protection, custom foam, or crating. Very large flat screens and thin panels are especially risky when packed without purpose-built materials.
Complex home theater and smart home installations can also benefit from extra help. Systems with multiple source devices, receiver wiring, in-wall or ceiling speakers, smart hubs, structured cabling, or patch panels can be tedious to dismantle and reconnect. Labels and photos help, but careful handling is still essential.
Insurance and liability may also influence the decision. Some moving policies distinguish between carrier-packed and owner-packed cartons. If a valuable TV, receiver, or console is damaged, having the mover pack it may simplify the claims process depending on the policy.
If you are planning a move in Alexandria or Northern Virginia and want help with packing, unpacking, storage, or careful handling of household electronics, Reputation Movers can help you prepare a smoother transition. Get a Quote at https://www.reputationmovers.com/contact-us or call (703) 660-6683.






















.webp)

.webp)
.webp)
.webp)

.webp)
.webp)








.webp)

.webp)


.png)