.webp)
.svg)
Moving a pool table is not the same as moving a sofa, dining table, or standard piece of furniture. A slate pool table is heavy, rigid, precisely assembled, and sensitive to small changes in alignment. If it is moved assembled or only partly taken apart, the slate can crack, the frame can twist, and the table may never play correctly until it is professionally reset.
The safest process usually involves full disassembly, careful component labeling, protected slate handling, controlled transport, and precise reassembly. The typical order is pockets, rails, felt, slate, frame, and legs. At the destination, that sequence is reversed, but the real difference comes from leveling, seam work, rail alignment, and final play testing.
At Reputation Movers, we help homeowners and renters throughout Alexandria, Northern Virginia, and the greater DMV area plan moves that involve heavy, delicate household items. If you have questions about moving a pool table as part of a local or long-distance move, you can contact us for practical guidance before moving day.

Moving a Pool Table Safely Starts With Planning the Route
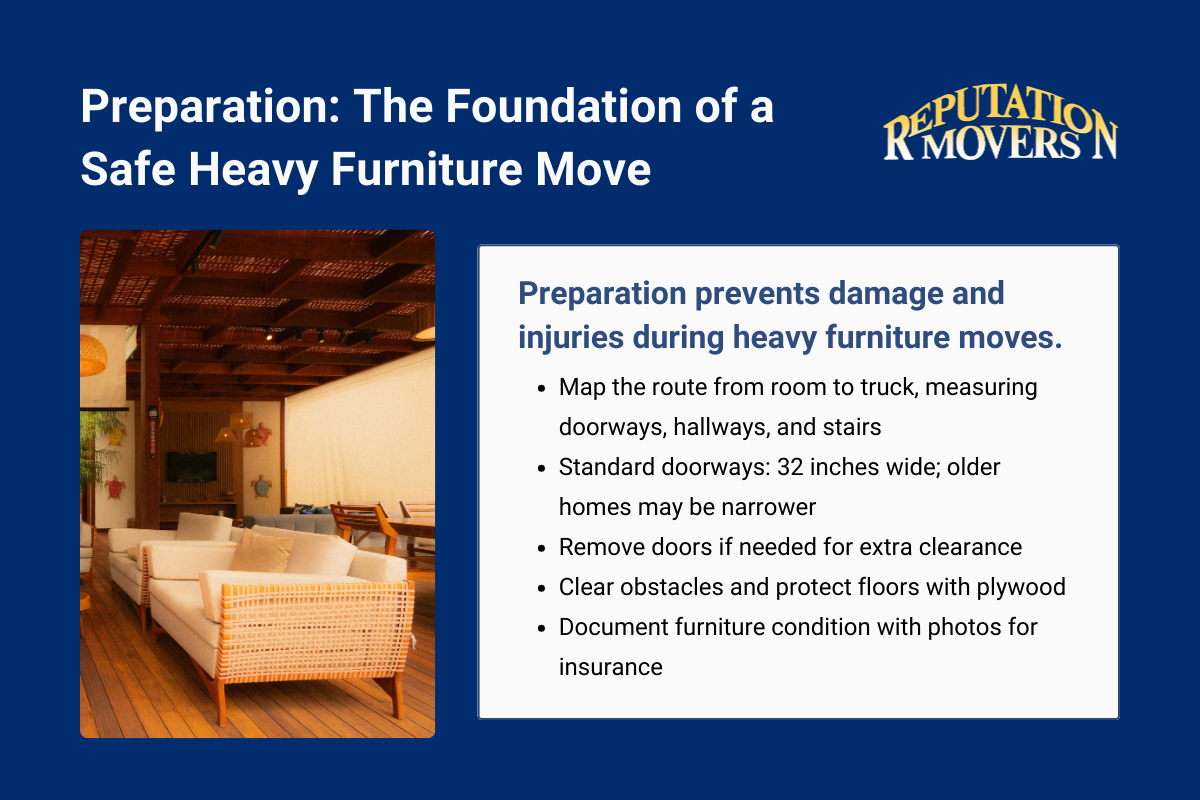
Before a tool touches the table, the route needs to be studied. Professional pool table movers walk the path from the table to the truck and from the truck to the final room. Door widths, stair runs, landings, tight corners, floor transitions, and obstacles all matter.
This step is not just about convenience. It determines how many people are needed, what equipment should be staged, and whether the table must be fully disassembled before anything moves. In most homes, especially those with stairs or narrow hallways, full disassembly is the correct approach.
Guidance from moving professionals consistently warns against attempting to move an assembled slate table because it can crack slate, twist frames, and injure handlers, especially when stairs or tight access are involved. The common disassembly order is pockets, rails, felt, slate, frame, and legs, then the reverse order during setup.
Planning should also include documentation. Photos of rail positions, hardware clusters, pocket assemblies, and slate orientation are useful during reassembly. Professionals also note the table’s current condition before removing parts, which helps separate pre-existing wear from move-related concerns.
The Right Disassembly Sequence Protects the Table From Stress
A pool table is built as a system. The rails, slate, frame, legs, pockets, and felt all depend on one another being installed in the right order and position. Taking pieces off randomly increases the chance of missing hardware, damaging finished wood, or creating alignment problems later.
The sequence matters because each step exposes the next connection point. Pockets come off first so the rails can be removed. Rails come off before the felt and slate can be handled. Slate must be removed before the frame and legs are safely broken down.
Pockets are removed first and labeled by exact position
Disassembly usually starts underneath the table with the pockets. Depending on the table, pockets may be leather or plastic drop pockets, or part of an integrated ball-return system. They are commonly held in place with screws or staples.
Movers use screwdrivers, staple pullers, and pliers to release fasteners carefully. Small hardware is immediately placed into labeled containers so pieces are not lost. This matters because pocket liners, trims, or ball-return parts may not be interchangeable from one table location to another.
Each pocket should be labeled by position, such as corner pocket, head end, right, or side pocket, left. If the table has a ball-return system, chutes and tubes should be detached and marked so the route from each pocket to the return rack can be recreated.
Rails come off next and should be handled by two people
Rails are typically bolted to the slate from underneath. Many tables have six cushioned bumper sections, and each rail may have several bolts depending on the design. Using the correct socket size helps prevent stripped bolt heads and damaged hardware.
Each rail section should be removed with at least two people. Rails can twist or warp if they are lifted carelessly. Once removed, they should be labeled for orientation, with their bolts and washers stored in a matching bag.
Professional movers wrap rails individually in moving blankets or bubble wrap and stage them away from the work area. That prevents rails from being kicked, stepped on, dented, or scratched while the rest of the table is coming apart.
Felt Removal Requires Patience Because Cloth Can Stretch or Tear
After the pockets and rails are removed, the felt or cloth covering the slate can be addressed. This is one of the most delicate parts of the process because the cloth may be reused only if it comes off cleanly and keeps its shape.
Some tables have felt stapled around the perimeter. Others, including some Brunswick or Olhausen models referenced in moving guidance, may have glued felt. Stapled cloth is usually loosened with a staple remover or small flat-head screwdriver, working slowly around the table edge.
Glued felt requires even more care. Movers peel from one corner at a shallow angle, moving gradually to reduce stretching and tearing. If the cloth stretches, rips, or loses its shape, replacement is usually the better plan.
If the felt will be reused, it should be rolled loosely rather than folded. Folding can create creases that affect appearance and play. The rolled cloth should be kept clean, dry, and protected until reinstallation.
Slate Is the Heaviest and Most Fragile Part of a Pool Table Move
The slate bed is the part of the table that creates the smooth playing surface, but it is also the component most likely to cause serious problems if mishandled. Many tables use three-piece slate designs, and total slate weight can reach roughly 450 pounds, with individual sections often weighing 150 to 250 pounds.

Weight alone is not the only issue. Slate is brittle. It can chip at the edges, crack if flexed, or break if dropped. Even minor damage can affect how sections meet and how level the playing surface can become during reassembly.
Before slate is lifted, movers remove the screws or bolts securing each section to the frame. Hardware is placed into labeled resealable bags. If the table uses seam filler, such as beeswax between slate sections, technicians score the filler at the seams before separation to reduce the risk of chipping.
Slate sections must be labeled before they are moved
Each slate section should be marked with painter’s tape or a similar removable label. The label should show its position and orientation, such as left, center, right, and top side. This ensures each piece goes back in the same location during reassembly.
This level of detail matters because the table was previously aligned as a set of components. Reversing or swapping slate sections can create avoidable leveling challenges. Original placement gives the best chance of restoring the table’s prior playing condition.
Lifting slate should never be treated as a casual carry. Multiple trained people are needed, and stair work raises the risk. Some professional guidance notes that slate sections should not be carried on stairs by fewer than three people, because controlling a heavy section on a turn is difficult and dangerous.
Protecting Slate During Transport Depends on Padding, Positioning, and Restraint
Once slate is removed, protecting it becomes the central concern. The objective is to prevent chips, cracks, moisture exposure, sharp-edge contact, and shifting during transit. A slate section that moves inside the truck can damage itself, other components, or the vehicle.
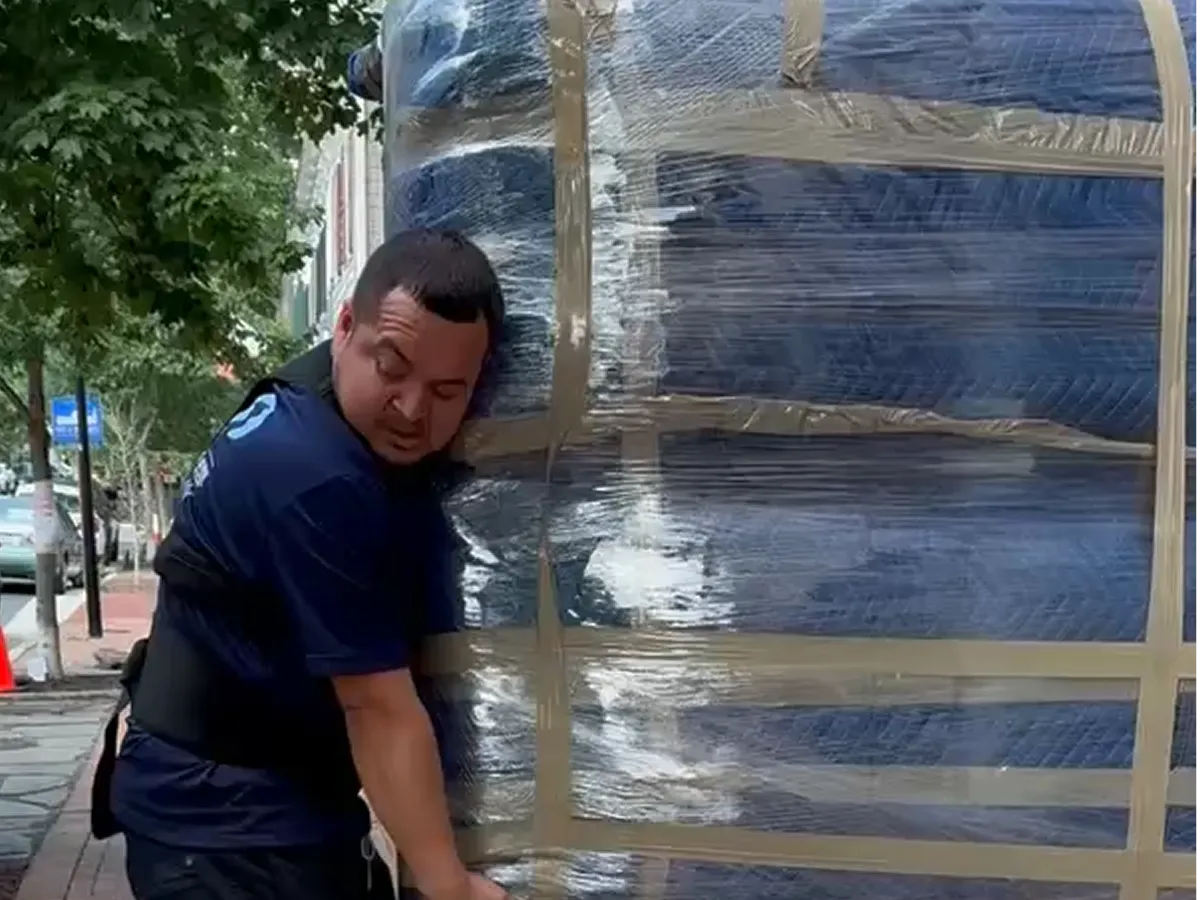
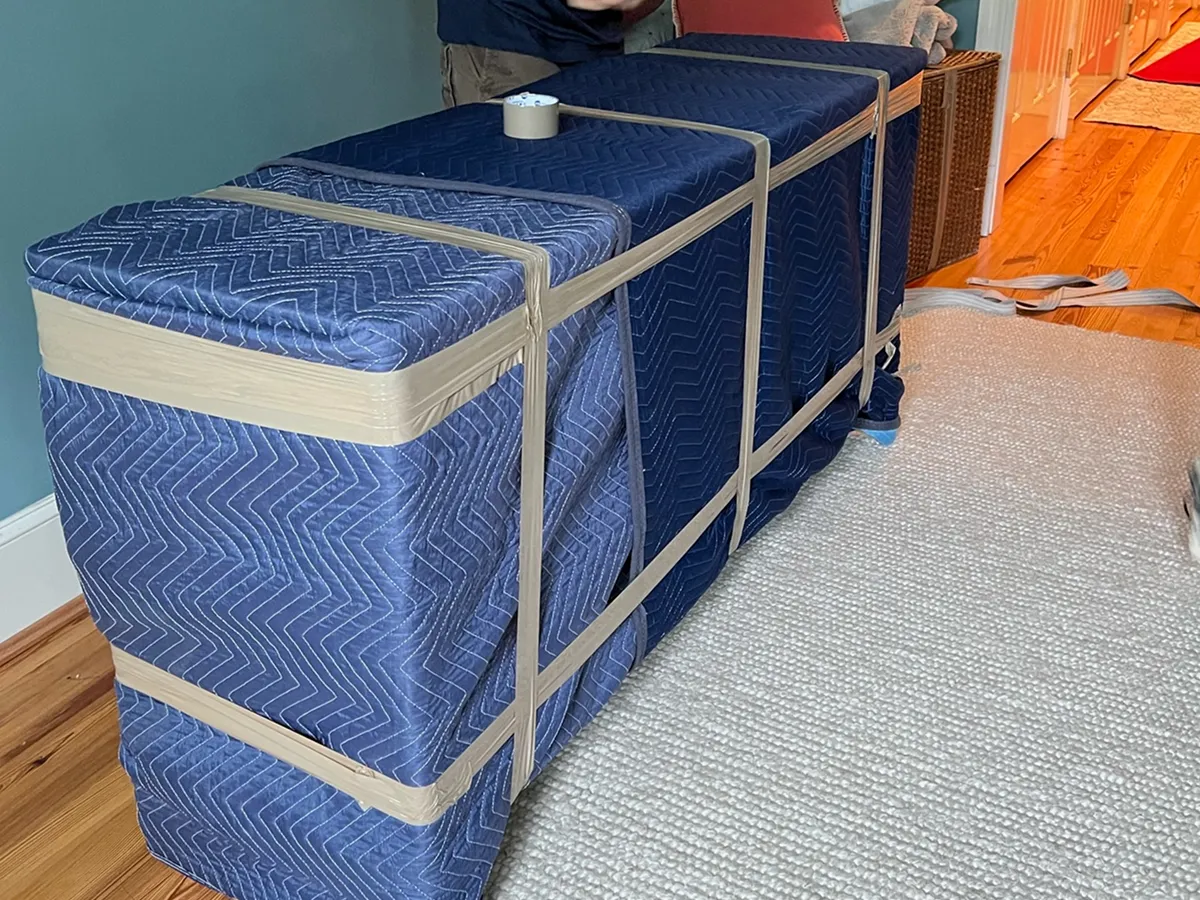
Professional moving guides stress that slate should be covered so no stone is exposed. Thick moving blankets, packing tape, and stretch wrap help protect the edges and surfaces. Slate should also be marked fragile and kept away from sharp metal edges or heavy objects that could impact it.
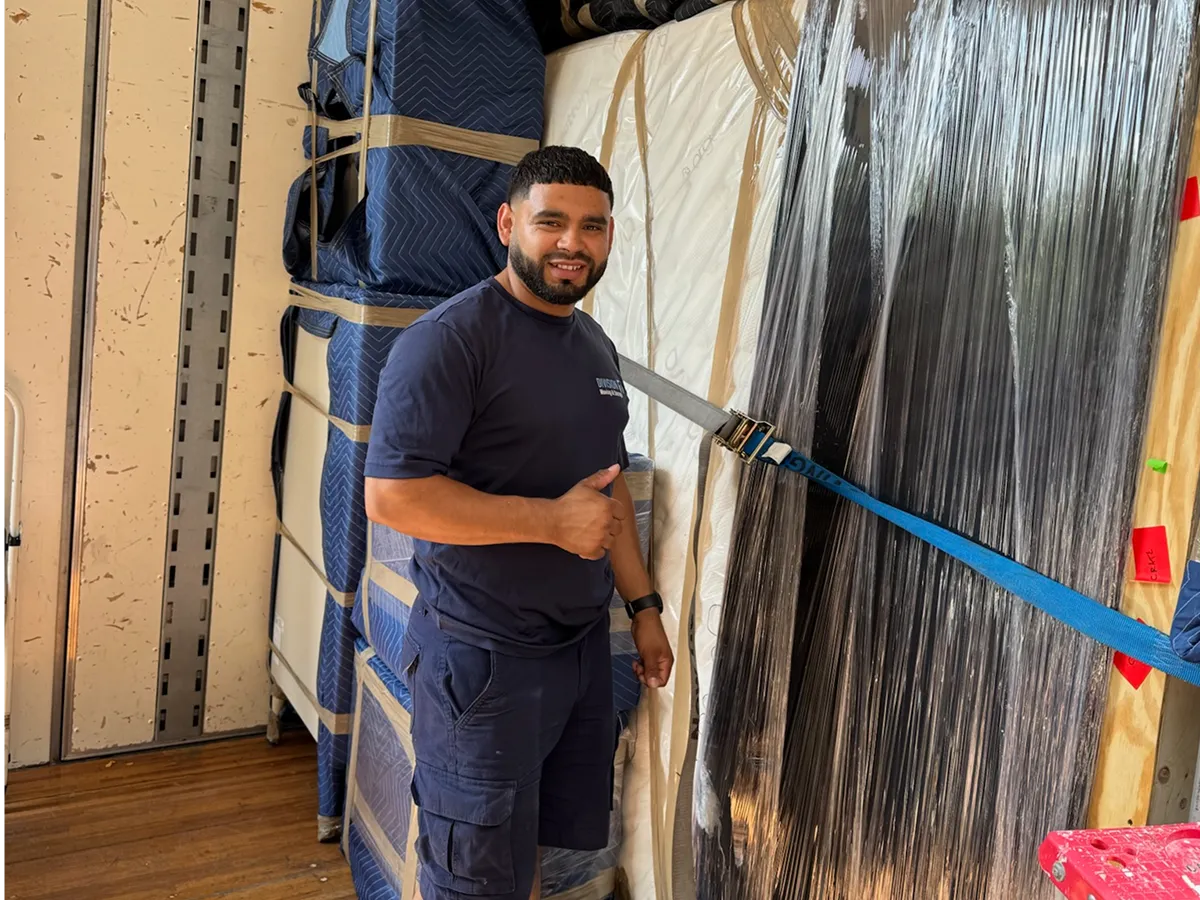
There is more than one method for positioning slate during transport. Some movers transport slate vertically on its side and strap sections together and to the truck walls. Others keep slate flat when it can be fully supported across the entire surface. In either case, the key is controlled support and prevention of shifting.
Several handling practices reduce risk during this stage. These details may seem small, but they are often what separate a smooth pool table move from a costly repair or replacement problem. Before the slate is loaded, the crew should know how it will be wrapped, carried, positioned, and secured.
Wrap each slate piece in thick moving blankets so the surface and edges are protected.
Use packing tape or stretch wrap to hold padding in place without exposing stone.
Keep slate away from sharp metal edges, loose tools, and unpadded furniture parts.
Secure slate with straps so it cannot shift during turns, braking, or road vibration.
Avoid stacking heavy items on slate, whether it is transported vertically or flat.
Protect slate from moisture and rapid temperature changes during storage or transit.
For homeowners coordinating a larger relocation, this is where specialty moving experience makes a practical difference. Reputation Movers’ packing, storage, and moving services can be planned together so delicate components, heavy furniture, and household goods are handled in one organized schedule.
The Frame, Legs, Rails, and Hardware Need Their Own Protection Plan
After slate removal, the wood frame and legs can be disassembled. This may include cross-beams, support blocks, legs, and other structural members. Since the slate depends on the frame for support, these pieces need to be protected from impact, moisture, and warping.
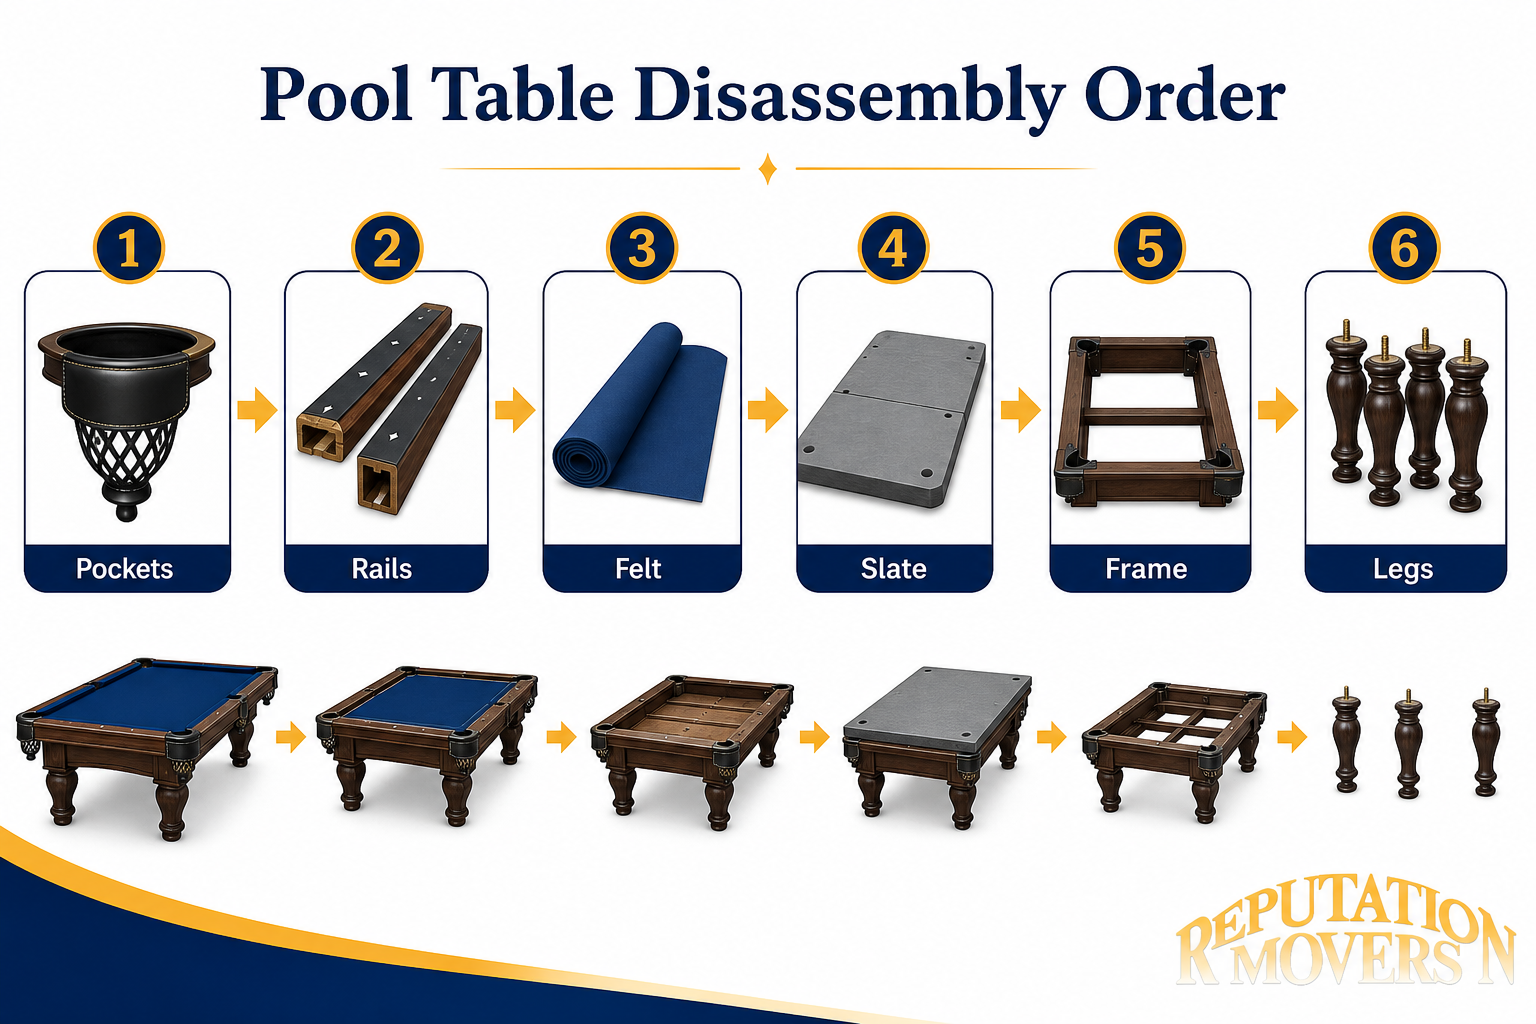
Movers unbolt legs and separate frame members systematically. Screws, nuts, washers, and bolts should be grouped by assembly stage, such as frame, legs, rails, and pockets. Many professionals tape labeled hardware bags directly to the corresponding component or use segmented organizers.
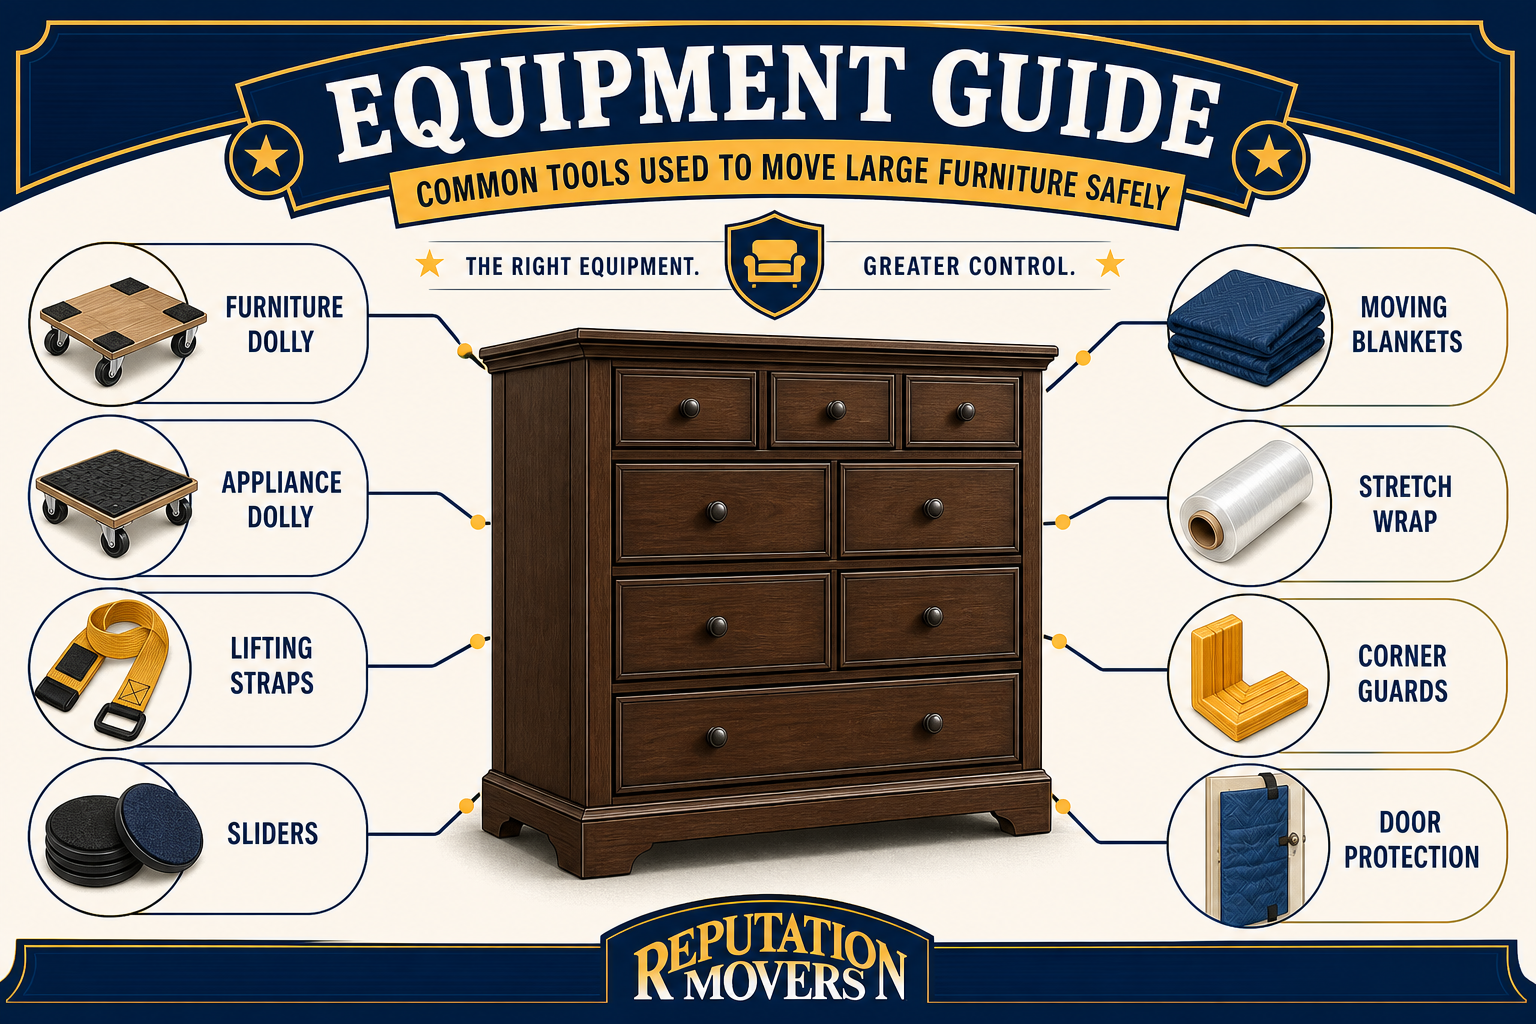
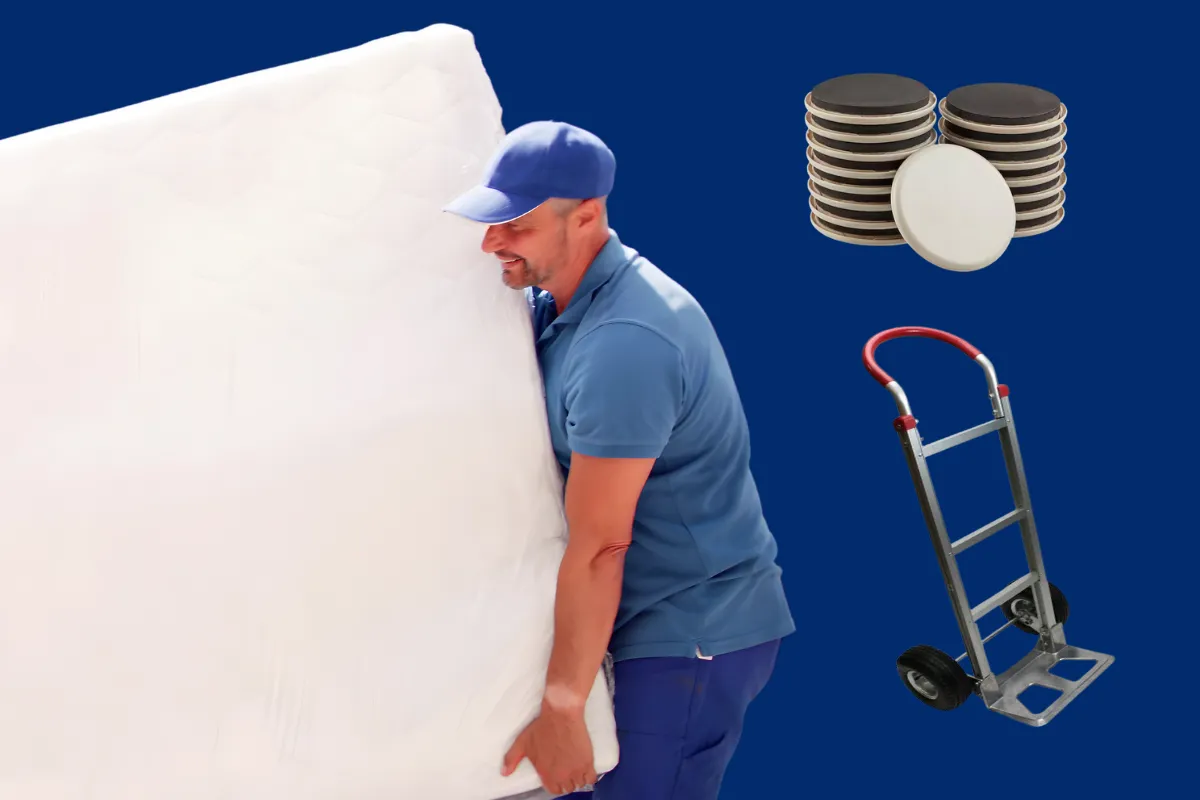
Wood pieces should be wrapped in moving blankets or bubble wrap before being carried out. Dragging heavy components across hardwood or tile can damage floors and place unnecessary strain on the furniture. Dollies, sliders, floor runners, corner guards, and additional blankets may be used to protect both the table and the home.
Hardware control is especially important. Missing bolts or mismatched rail hardware can compromise structural rigidity or affect cushion performance. A pool table may look assembled after a move, but if rails are misaligned or fasteners are unevenly installed, gameplay can suffer.
DIY Pool Table Moving Is Risky in Homes With Stairs, Narrow Halls, or Tight Turns
DIY pool table moving is often underestimated because the table appears sturdy. The danger is that sturdiness does not mean it can be moved as one unit. Slate tables weigh several hundred pounds, and their frames are not designed to be tilted, flexed, and carried through a home while assembled.
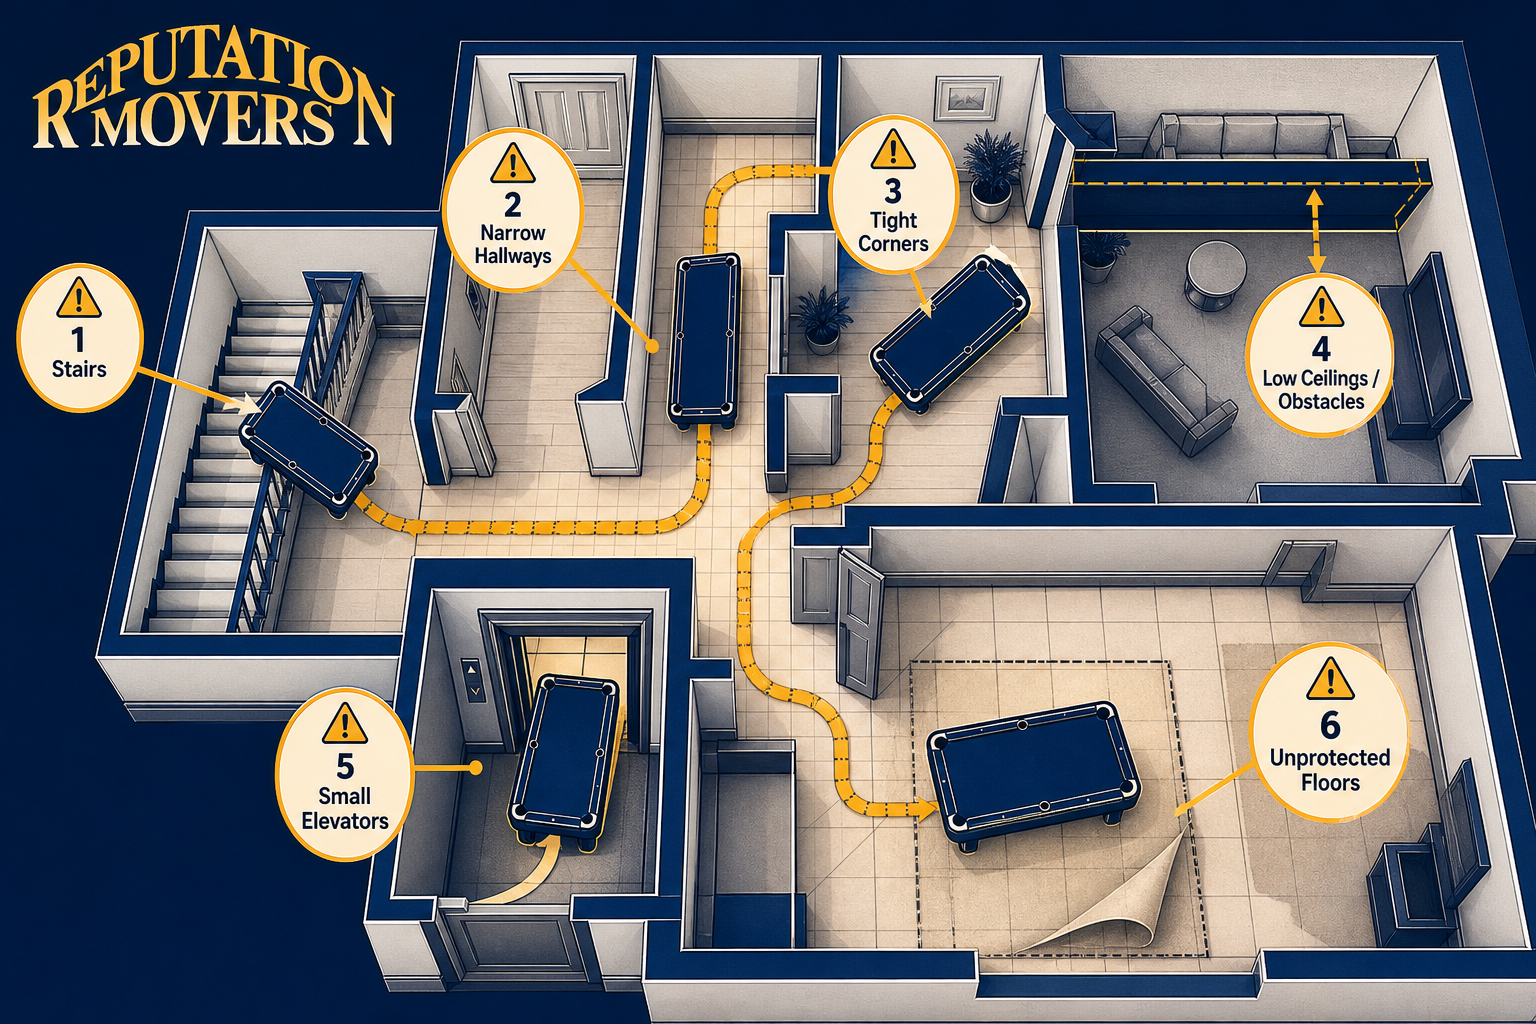
Consumer moving guidance warns that DIY pool table moving is high-risk, especially in multi-story homes or buildings with tight access. An intact move may only be viable in limited conditions, such as a single-floor route, smooth and level floors, very wide doorways, experienced movers, and properly rated dollies.
When those conditions are not met, disassembly is the safer path. Even then, untrained movers face hazards related to weight, balance, tight turns, and fragile components. The risk is not only to the table, but also to walls, trim, stair railings, floors, and the people doing the lifting.
The most common trouble spots should be identified before anyone starts moving parts. Each one creates a different type of risk, so the plan should match the home’s layout. The table’s size, the route, and the available manpower all affect whether a move is realistic without professional help.
Stairs: A heavy slate section can be difficult to control on a landing or turn, increasing the chance of drops, injuries, and chipped slate.
Narrow hallways: Long rails and frame pieces can gouge walls or door frames if they are not wrapped and carried carefully.
Tight corners: Tilting or angling an assembled table can stress the frame and slate under the table’s own weight.
Low ceilings or obstacles: Basements and mechanical areas can limit maneuvering space for slate and large frame components.
Small elevators: Weight limits or short cabs can create unsafe handling choices for heavy slate sections.
Unprotected floors: Dragging or concentrating heavy weight in small areas can damage floor finishes.
A guide from The Home Depot explains that pool table felt may be stapled or glued and that careful removal is needed during disassembly, while broader moving guidance highlights the risks of moving heavy slate components through a home. These details show why felt may be stapled or glued is not a minor distinction during a pool table move.
Professional Reassembly Is About More Than Putting the Table Back Together
At the destination, reassembly happens in reverse order: legs and frame, slate, felt, rails, and pockets. That may sound straightforward, but pool table setup is a precision process. The table must be structurally sound, flat, level, and aligned so balls roll and rebound consistently.
The frame and legs are assembled first in the chosen room. Movers perform a rough level using adjustable feet, shims, or sub-floor checks. If the frame is twisted or unstable, the slate cannot be corrected properly later.
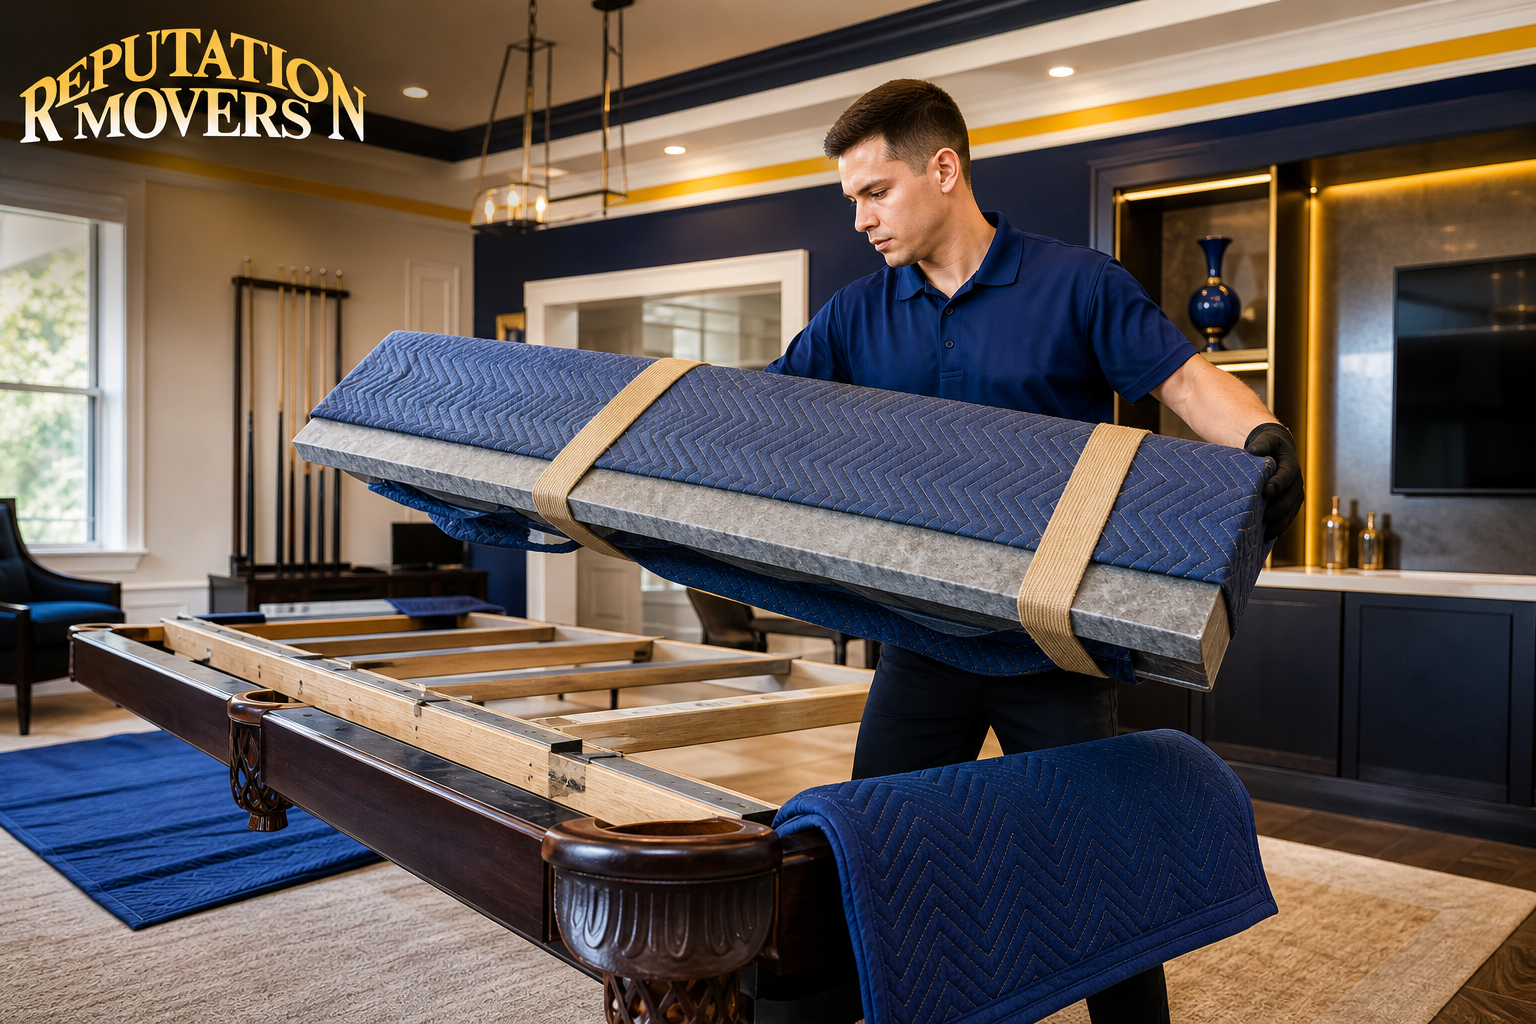
Once the frame is square and rigid, the labeled slate pieces are placed back in their original positions. Technicians use precision levels to check the full slate bed from end to end and side to side. Shims may be inserted under slate corners and edges until readings are consistent.
Seams between slate sections are then filled, often with beeswax or similar filler, and scraped smooth. If this step is rushed, players may feel transitions beneath the felt, or balls may roll inconsistently across seam areas. Any minor chips or edge concerns should be addressed before cloth goes back on.
Re-Leveling Matters Because Small Setup Errors Change Ball Roll and Cushion Response
A pool table can look level to the eye and still play poorly. Small deviations in slate level can cause ball drift over longer shots. Uneven rail tightening can create inconsistent cushion rebound, dead spots, small gaps, or unpredictable angles.
Professional re-leveling addresses these problems before the move is considered finished. Movers check the table with high-accuracy bubble or digital levels and may perform ball-roll tests in multiple directions. These tests help detect drift, inconsistent speed, or other signs that the slate or frame needs adjustment.
Felt installation also affects play. When felt is reused, it must be stretched evenly over the leveled slate with consistent tension. If new cloth is installed, it must be aligned properly with pocket cutouts and rail bolt holes to avoid ripples, puckering, or wear problems.
Rail reinstallation is another critical step. Rails must be aligned so cushions produce consistent rebound along the entire perimeter. Bolts should be tightened evenly because uneven pressure can change cushion response and affect gameplay.
MoveBuddha’s pool table moving guidance notes that rails are typically removed in sections and that components should be carefully organized, which supports accurate reassembly. Proper labeling and protection make it easier to restore consistent rebound along the perimeter after the table is put back together.
Storage and Packing Can Be Part of a Safer Pool Table Move
Some pool table moves are not direct from one finished game room to another. Renovations, delayed closings, staggered move dates, and basement work can require temporary storage. In those cases, the same care used during transport should continue while the table is off-site.
Slate, finished wood, felt, hardware, and accessories should be stored in clean, dry, temperature-stable conditions. Slate should remain padded and marked fragile. Felt, balls, racks, cues, lights, and hardware should be boxed and labeled so they are protected from dust, moisture, and loss.
Packing services can also support the move. Rails, legs, frame pieces, and slate all need padding. Long-distance moves may require added protection for slate and rail sections so loading is more predictable and components are shielded from impact.
This is especially useful when the pool table is part of a whole-home move. Game-room furniture, cue racks, arcade pieces, bar units, and related items can be packed and transported under the same plan. Coordinating these details reduces confusion and helps ensure the room can be set up properly at the destination.
A Practical Step-by-Step View of How to Move a Pool Table
Every pool table and home layout is different, but the core process follows a recognizable order. The purpose is to remove stress from the table gradually, protect each component, and preserve the information needed for accurate reassembly. Skipping steps or failing to label parts creates problems later.
This overview is useful for understanding what professionals do and why the process takes care. It is not a shortcut around the risks of handling slate or moving large components through tight spaces. Instead, it shows why pool table moving is a specialty task rather than a standard furniture carry.
Find a Mover’s moving guide emphasizes route measurement and preparation before disassembly, including doorways, hallways, and the path to the truck. That early planning helps avoid surprises when moving doorways, hallways, and the path with large and fragile components.
Inspect the table and photograph hardware, pockets, rails, and assembly details.
Measure the full route, including doors, stairs, landings, corners, and floor changes.
Remove pockets first, then bag and label each one by position.
Unbolt and remove rails, label their orientation, and wrap them individually.
Remove stapled or glued felt slowly, then roll reusable cloth loosely for protection.
Remove slate fasteners, score seam filler where needed, and label each slate section.
Lift slate with the right number of trained people and wrap it in thick padding.
Disassemble the frame and legs, keeping hardware grouped and labeled.
Load components so slate is supported, secured, and protected from shifting.
Reassemble in reverse order, then level, seam, cloth, rail, pocket, and test the table.
When Professional Help Is the Better Choice
A pool table move becomes more complex when the table is slate, the route includes stairs, the home has narrow halls, or the destination room still needs setup work. Weight, brittleness, and precision alignment all raise the stakes. A mistake can damage the table, the home, or the people moving it.
Professional help is also valuable when timing is complicated. Storage, packing, furniture assembly, and home organization can all intersect with a pool table move. If the table needs to come out before renovation work or wait in storage before reinstallation, a coordinated plan can protect the components and simplify scheduling.
U-Haul’s moving guidance highlights the importance of wrapping pool table components and protecting slate, rails, and other parts during the move. That type of component-level protection is central to avoiding damage when wrapping pool table components for transport or storage.
The most important reason to use qualified movers is the final result. A pool table is not truly moved until it is level, stable, aligned, and ready for accurate play. Reassembly without careful leveling can leave the table looking fine but playing poorly.
Get Help Moving a Pool Table in Northern Virginia
If you are planning a move that includes a pool table, start with the route, the disassembly plan, and the re-leveling requirements. Protecting the slate is essential, but so is preserving the table’s structure and restoring accurate gameplay at the destination.
Reputation Movers provides moving, packing and unpacking, storage, furniture assembly and staging, and home organizing services for customers in Alexandria and surrounding Northern Virginia communities. To discuss your move and get a quote, call (703) 660-6683 or visit https://www.reputationmovers.com/contact-us.


















.webp)

.webp)
.webp)
.webp)

.webp)
.webp)








.webp)

.webp)


.png)